모니터로 데이터를 출력하는 방법
1. 기본 출력스트림인 OutputStream 사용(byte 단위로 처리)
- write() 메서드를 호출하여 byte 단위 출력
- byte 단위로 처리되므로 문자열 데이터 자체를 처리할 수 없음
OutputStream 객체를 연결하기 위해서는 System.out 사용
char ch = 'A';
		try(OutputStream os = System.out) {
			//write() 메서드를 호출하여 1byte 데이터를 출력
			os.write(ch);
		} catch (IOException e) {
			e.printStackTrace();
		}
결과: A
문자열은 출력되지 않는다.
그 이유는 1byte 단위로 출력하므로 한글, 한자 등 출력이 불가능하다.
그렇다면, 문자열을 출력하는 방법은?
String 타입 데이터(문자열)를 Outputstream 으로 출력해보자.
String str = "Hello, 자바!";
		try(OutputStream os = System.out) {
			//write(byte[] b) 메서드를 호출하여 출력할 데이터를 배열로 전달
			os.write(str.getBytes()); // '강'은 2~3byte
			// 1byte 단위로 출력하므로 한글, 한자 등 출력이 불가능하다.
		} catch (IOException e) {
			e.printStackTrace();
		}
결과 : Hello, 자바!
Test!
데이터를 입력하면 입력된 데이터를 출력하는 프로그램을 만들어보자.
조건 : 입력 스트림에서 데이터(문자열)을 읽어서 출력 스트림을 통해 데이터를 출력한다.
ex) 입력 문자열 : 땅콩 화면에 출력되는 형태 : 입력한 데이터는 땅콩입니다.
BufferedReader를 사용하여 입력받은 문자열을 Outpurstream을 사용하여 출력해보면,
//1. 기본 입력스트림 객체(Inputstream) 생성 = byte 단위 처리
InputStream is = System.in;

//2. 입력스트림을 연결하는 보조스트림 InputstreamReader 객체 생성 = char 단위 처리
InputStreamReader reader = new InputStreamReader(is);

// 3. 향상된 입력 보조스트림 BufferedReader 객체 생성 = String 단위 처리
try(BufferedReader buffer = new BufferedReader(new InputStreamReader(System.in));
	OutputStream os = System.out) {
System.out.print("데이터를 입력하세요: ");
// 입력 스트림에서 한 줄의 데이터(문자열) 읽어오기
String str = buffer.readLine();
System.out.print("입력한 데이터는 ");
//출력 스트림을 통해 입력 데이터를 출력
os.write(str.getBytes());
System.out.println("입니다.\\n");
} catch (IOException e) {
	e.printStackTrace();
}
결과:
데이터를 입력하세요: 땅콩
입력한 데이터는 땅콩입니다.
과정
- 기본 입력스트림 객체(Inputstream) 생성 =
byte 단위 처리 - 입력스트림을 연결하는 보조스트림 InputstreamReader 객체 생성 =
char 단위 처리 - 향상된 입력 보조스트림 BufferedReader 객체 생성 =
String 단위 처리
2. OutputStreamWriter 사용(char 단위로 처리)
- write() 메서드를 호출하여 char[] 배열 또는 String 객체를 전달하여 문자 데이터 출력 가능 => String 클래스는 char[] 배열로 관리되므로 writer 계열에서 처리 가능
- FileOutputStream => 파일에
바이트 단위자료를 출력하기 위해 사용하는 스트림
try(OutputStreamWriter writer = new OutputStreamWriter(System.out)) {
	String str = "Hello, 자바!";
	writer.write(str);
} catch (IOException e) {
	e.printStackTrace();
}
출력내용을 파일에 저장하려면 아래와 같은 작업을 해야한다.
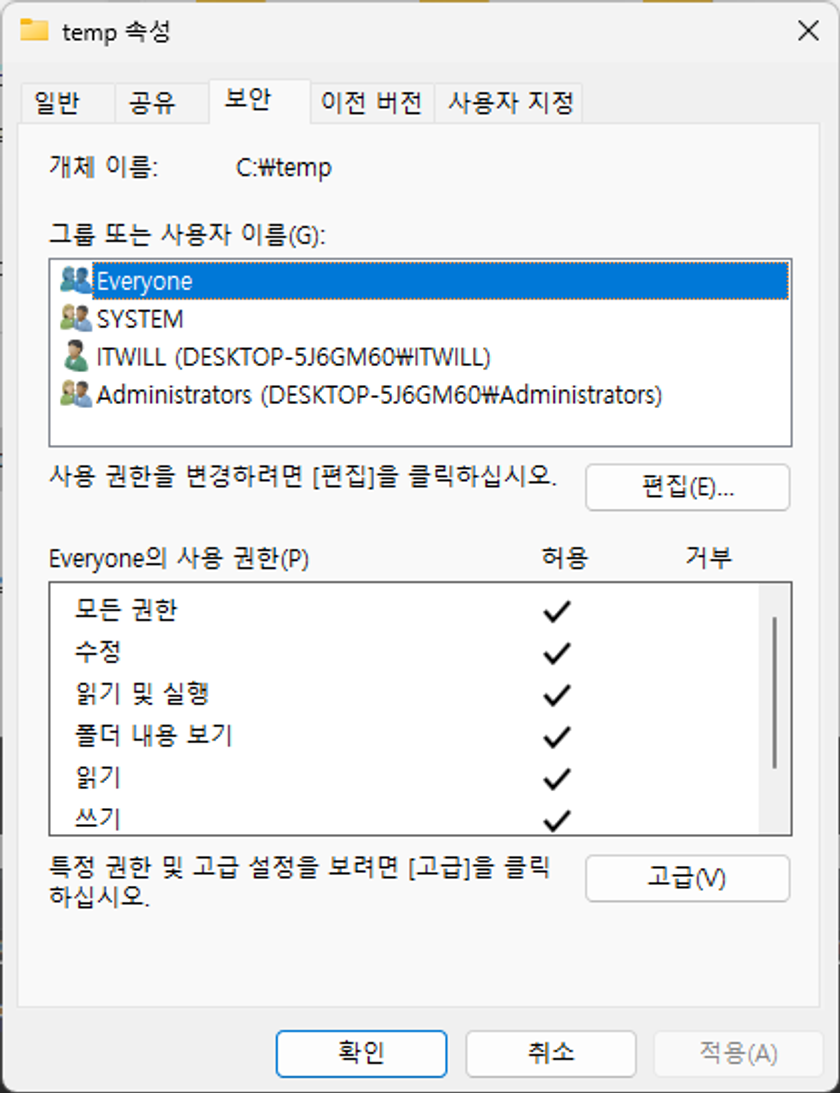
C:\temp 임시폴더 생성 후
1. 액세스 권한부여 -> 특정 사용자 -> Everyone 추가하기(읽/쓰)
또는
2. 속성→ 편집 → 보안탭


둘 중에 어느 방법으로도 가능
이제 다시 이클립스로 돌아가서 출력 내용을 파일에 저장해보자.
try(FileOutputStream fos = new FileOutputStream("C://temp/data.txt")) {
// 파일 관련된 스트림을 사용할때는 FileNotFoundException 이라는 예외가 발생할 수 있으니 위치를 지정해야함
// FileNotFoundException 에러 : 지정된 위치에 파일이 없을때
fos.write(65); // 파라미터를 숫자로 쓰면 해당 아스키코드값으로 변환됨 - A
fos.write(66); // B
} catch (FileNotFoundException e) {
e.printStackTrace();
} catch (IOException e) { //add catch를 통해 catch문 추가
e.printStackTrace();
}
실행해보면
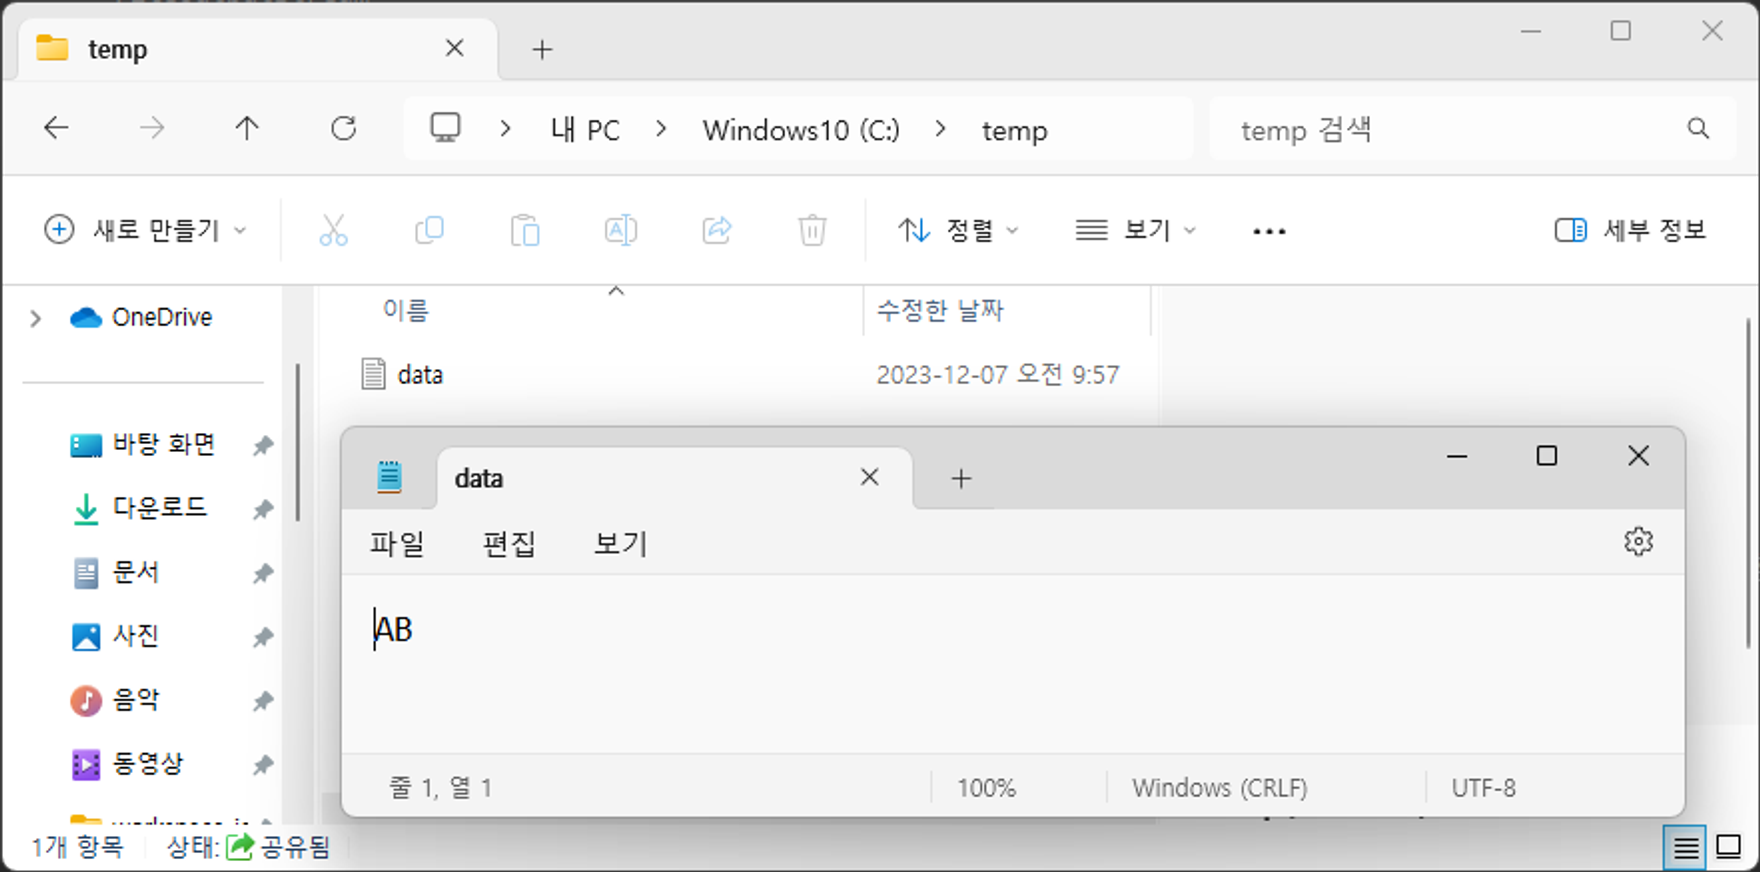
C:\temp에 data.txt.라는 파일이 생기고
data.txt 파일안에 AB 라는 내용이 생긴다.

즉, catch 항목을 IOException e로만 처리 가능하다.
fos.write(67);
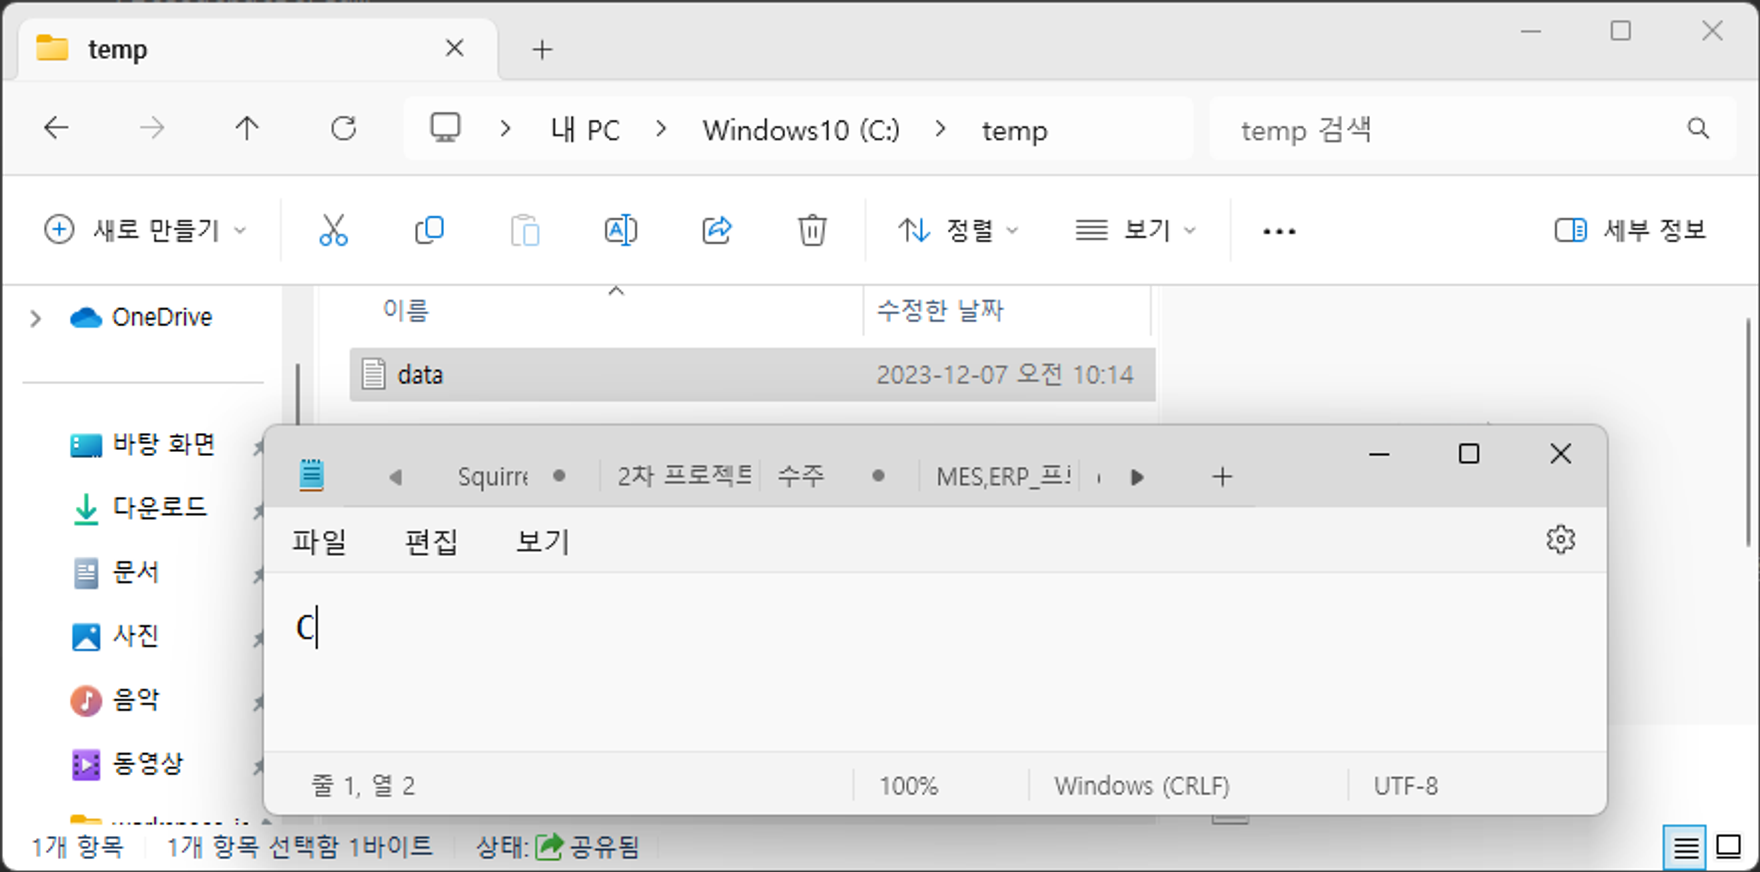
로 변경해보면

내용이 C로 바껴있다.
즉, 파일 저장위치가 같으면 기존의 데이터는 사라지고 새로운 데이터로 대체된다.
만약, 기존 자료에 이어서 출력하고 싶다면 생성자의 두번째 매개변수에 true를 입력해야한다.
try(FileOutputStream fos = new FileOutputStream("C://temp/data.txt")) {
    // 파일 관련된 스트림을 사용할때는 FileNotFoundException 이라는 예외가 발생할 수 있으니 위치를 지정해야함
    // FileNotFoundException 에러 : 지정된 위치에 파일이 없을때
    fos.write(65); // 파라미터를 숫자로 쓰면 해당 아스키코드값으로 변환됨
    fos.write(66);
} catch (FileNotFoundException e) {
    e.printStackTrace();
} catch (IOException e) { //add catch를 통해 catch문 추가
    e.printStackTrace();
}
-------------------------------------------------------------------------------------
↓↓↓↓↓↓↓↓↓↓↓↓↓↓↓↓↓↓↓↓↓↓↓↓↓↓↓↓↓↓↓↓↓↓↓↓↓↓↓↓↓↓↓↓↓↓↓↓↓↓↓↓↓↓↓↓↓↓↓↓↓↓↓↓↓↓↓↓↓↓↓↓↓↓↓↓↓↓↓↓↓↓↓↓↓
try (FileOutputStream fos = new FileOutputStream("C://temp/data.txt", true)) {
	// 파일 관련된 스트림을 사용할때는 FileNotFoundException 이라는 예외가 발생할 수 있으니 위치를 지정해야함
	// FileNotFoundException 에러 : 지정된 위치에 파일이 없을때
	fos.write(67);
} catch (FileNotFoundException e) {
	e.printStackTrace();
} catch (IOException e) { // add catch를 통해 catch문 추가
	e.printStackTrace();
}
파일에 바이트 배열로 출력하기
- FileOutputStream => 파일에
바이트 단위자료를 출력하기 위해 사용하는 스트림
try(FileOutputStream fos = new FileOutputStream("C://temp/data2.txt",true)) {
    byte[] bArr = new byte[26];
    byte data = 65; // 'A'의 아스키 값
    for(int i = 0; i < bArr.length; i++) {
        bArr[i] = data;
        data++;
    }

    fos.write(bArr);
    // => 배열을 한꺼번에 출력

} catch (FileNotFoundException e) {
    e.printStackTrace();
} catch (IOException e) {
    e.printStackTrace();
}

System.out.println("출력이 완료되었습니다!");
배열을 원하는 만큼 출력하려면
fos.write(bArr, 2, 10);
을 사용함.
위 코드는 배열의 세번째 위치부터 10개 바이트 출력한다.
BufferedOutputStream 활용
- 데코레이션 패턴을 활용하기 위해 BufferedOutputSteram 객체 사용 가능 =>
바이트 단위로 출력하는 시스템에 버퍼링 기능을 제공
//FileOutputStream
FileOutputStream fos = new FileOutputStream("C://temp/data3.txt");

//BufferedOutputStream의 버퍼크기를 5로 설정
BufferedOutputStream bos = new BufferedOutputStream(fos,5);
위 코드를 활용해보자
try(BufferedOutputStream bos =
	new BufferedOutputStream(new FileOutputStream("C://temp/data3.txt"), 5)) {
// 파일 data3.txt에 1부터 9까지 출력
for(int i = '1'; i <= '9'; i++) {
	bos.write(i);
}
} catch (FileNotFoundException e) {
e.printStackTrace();
} catch (IOException e) {
e.printStackTrace();
}

System.out.println("출력이 완료되었습니다!");
결과: 123456789
BufferedWriter 활용
- BufferedWriter 는
문자 단위로 출력하는 스트림에 버퍼링 기능 제공 => OutputStreamWriter 보다 BufferedWriter 의 처리속도가 빠르다!
try(BufferedWriter bw = new BufferedWriter(new FileWriter("C://temp/data4.txt"), 5)) {
	// 파일 data4.txt에 가부터 나까지 출력
	for(int i = '가'; i <= '나'; i++) {
		bw.write(i);
	}
} catch (FileNotFoundException e) {
	e.printStackTrace();
} catch (IOException e) {
	e.printStackTrace();
}

System.out.println("출력이 완료되었습니다!");
결과: 가각갂갃간갅갆갇갈 … 나
'JAVA' 카테고리의 다른 글
| [JAVA] 객체 직렬화(Serialization) || 역직렬화(Deserialization) (0) | 2023.12.07 |
|---|---|
| [JAVA] 자바의 기본 데이터 입출력 (0) | 2023.12.07 |
| [JAVA] 자바 I/O - 키보드로부터 데이터를 입력받아 처리하는 방법 5가지 (1) | 2023.12.05 |
| [JAVA] 쓰레드를 일시 정지 상태로 만드는 방법 (1) | 2023.11.28 |
| [JAVA] 쓰레드의 우선순위 (2) | 2023.11.28 |
